Is your garage workshop starting to feel a little cluttered? Elisha Albretsen from Pneumatic Addict has teamed up with Simpson Strong-Tie to bring you an easy DIY garage storage wall system.
I love my garage. I love having a space where I can get creative and build things. Organizing said garage is a different matter. Until lately, I’ve had virtually no storage space for my tools. Everything was piled up in boxes or on the floor.
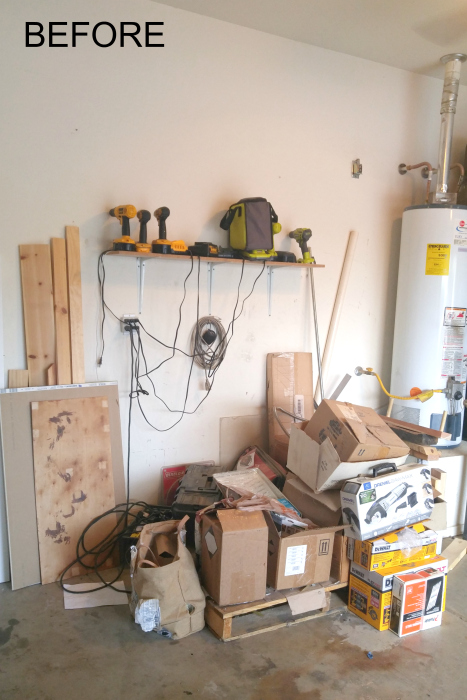
I was tired of stumbling every time I reached for a tool, so I finally grabbed some hardware and sketched up a plan for a garage storage wall system.
Materials Used:
- (1) 4ʹ x 8ʹ x 3/8″ OSB sheathing
- (3) 1×8 x 8ʹ boards
- (1) 1×12 x 8ʹ bullnose shelving
- (1) 2×4 x 8ʹ stud
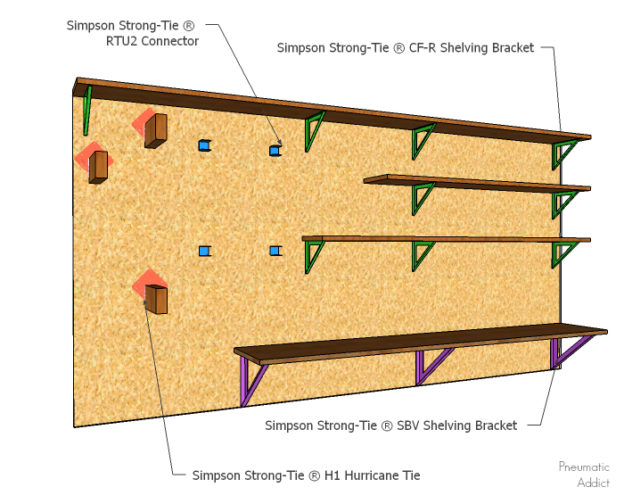
- (3) Simpson Strong-Tie® H1 hurricane ties
- (4) Simpson Strong-Tie RTU2 connectors
- (3) Simpson Strong-Tie SBV shelving brackets
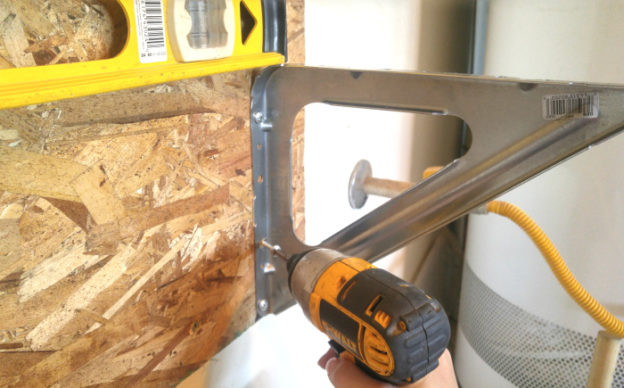
- (9) Simpson Strong-Tie CF-R shelving brackets
- (1) Box of Simpson Strong-Tie SD8x1.25″ wafer-head screws
- (1) Box of #8 x 5/8″ wood screws
- (1) Box of #8 x 2 1/2″ wood screws
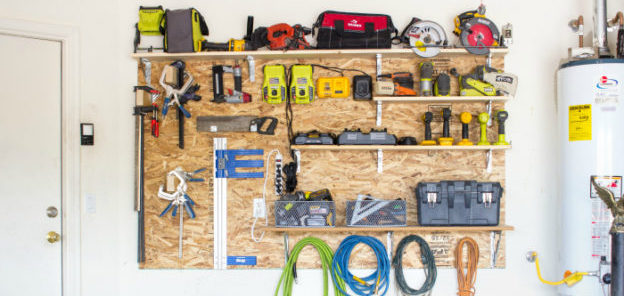
This garage storage wall system project is completely modular and adjustable to your needs. The component that makes the flexible design possible is the backerboard. My first step was to attach a 4′ x 8′ x 3/8″ sheet of OSB sheathing to the wall. This backer panel not only works as a base for the storage system, it helps to protect the wall behind it.
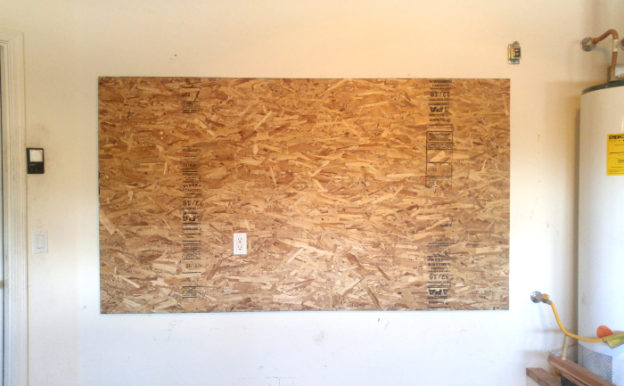
I made sure to locate the studs and securely fasten the OSB using #8 x 2 1/2″ wood screws. With the backerboard anchored to the structure of the wall, I could safely configure my storage any way that I like.
Since I build DIY furniture, I have quite a collection of clamps that I need easy access to.
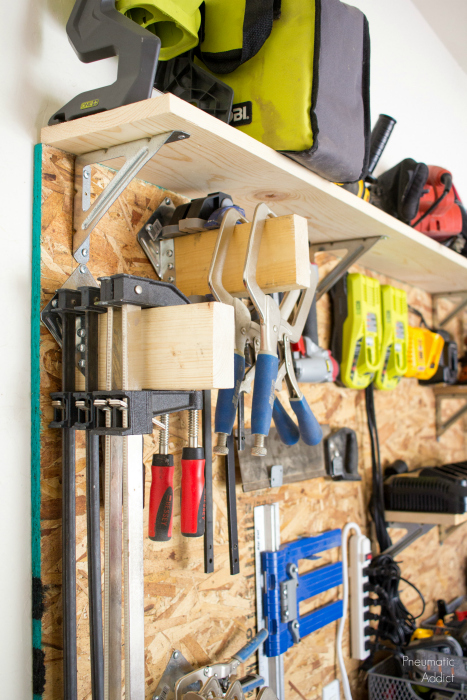
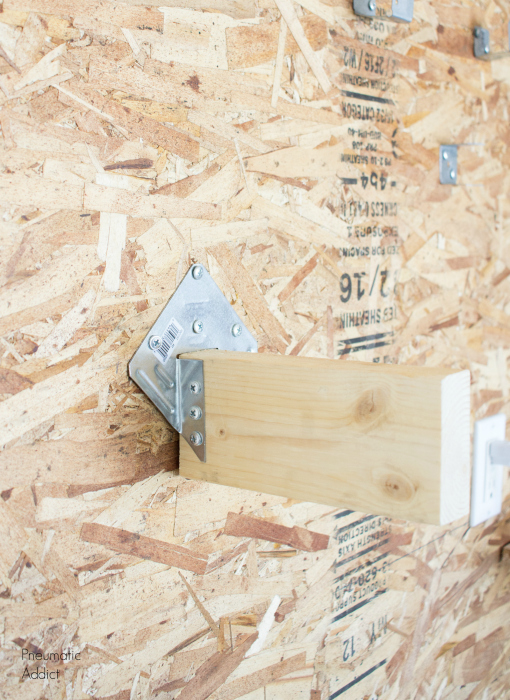
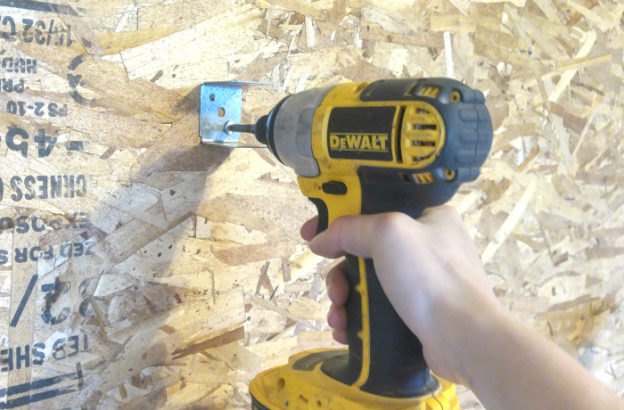
I came up with a super-easy solution. First, I attached a Simpson Strong-Tie® H1 hurricane tie to the OSB backerboard, upside down, using Simpson Strong-Tie SD 8×1.25″ wafer-head screws. Then I cut an 8″ length from a 2×4 stud and slid it into the opening, tight against the OSB. I secured the 2×4 using more SD8x1.25″ screws and I was ready to hang clamps.
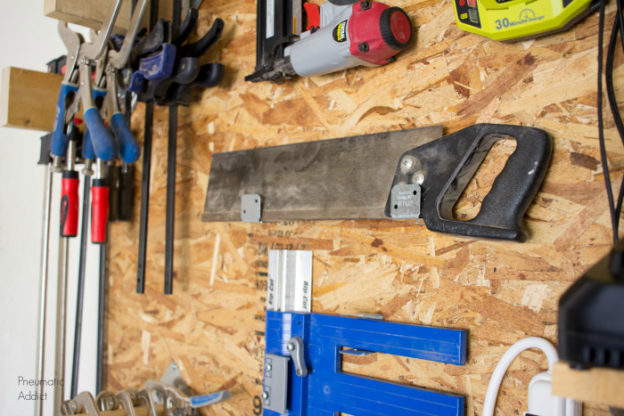
To create hooks for some of my hand tools, I attached Simpson Strong-Tie RTU2 connectors to the OSB backerboard, using SD8x1.25″ wafer-head screws.
They hold things like saws and levels perfectly.
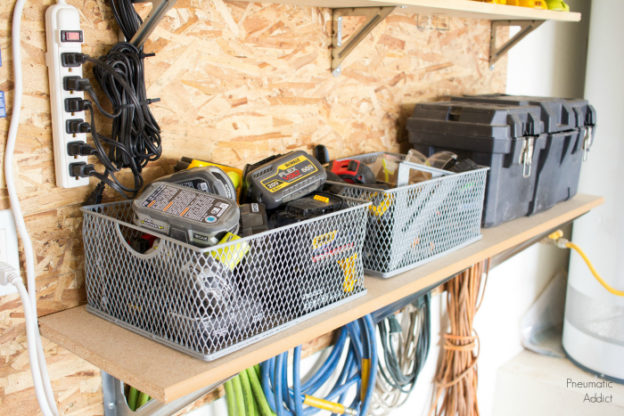
I have a healthy collection of chargers for my power tools. Some can be mounted to the wall, but a few need to sit on a flat surface such as a shelf.
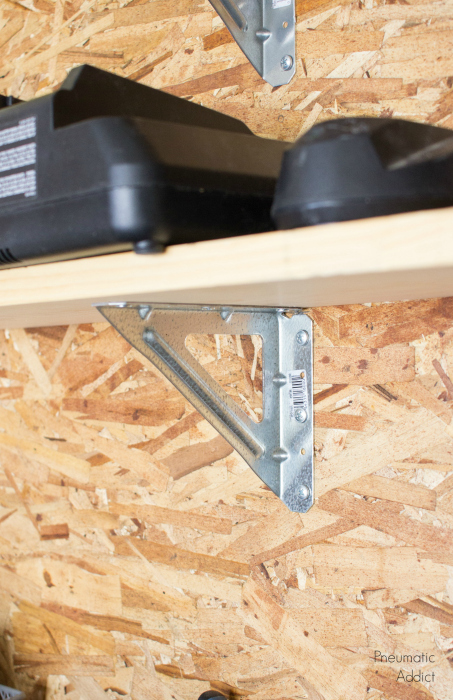
I attached three Simpson Strong-Tie® SBV shelving brackets along the bottom edge of the OSB and added a 1×12 bullnose shelf. To hold it in place, I drove #8 x 5/8″ wood screws through the bracket into the underside of the shelf.
The depth of the lower shelf allowed me to add a couple of baskets for items I need to grab quickly like batteries and measuring tapes.
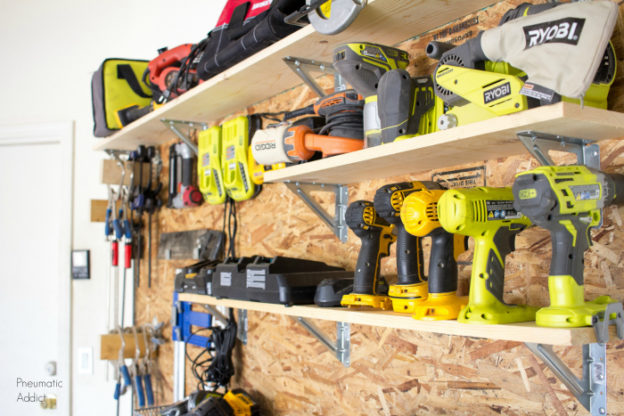
It was so convenient to be able to place my shelves wherever I needed them! If you have larger items to store, you can choose deeper shelves and space them further apart.
The space under the bottom shelf was the perfect spot to drive a few more screws for hanging extension cords and air hoses.
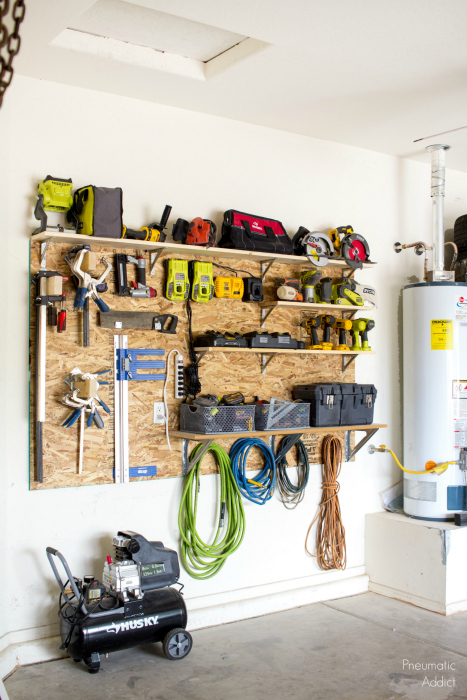
By thinking vertically, I’ve made much more storage space for myself! Each tool has a designated spot, and my garage should be a lot easier to keep tidy, even for the organizationally challenged like me.
Editor’s note: This post is part of an occasional series featuring guest bloggers who are Simpson Strong-Tie brand ambassadors. Today’s post is by Elisha Albretsen from Pneumatic Addict. She is a mom of twin boys and describes herself as an independent former hairstylist who loves to build.
OUTDOOR DIY PROJECTS
- How to Build a Cool, Modern Chicken Coop
- How to Build a Floating Deck
- How to Build an Outdoor Accents Pergola
- How to Build a Simple Rolling Planter