The farmhouse table: it’s a classic that’s been around for ages, built out of necessity using the same rough lumber farmers used for their barns. Planed and constructed using hand tools, these primitive barnwood tables were the center of the home, where all of the meals were prepared and served. Fast forward hundreds of years and that classic farmhouse table is still going strong. Many farmhouse tables are now being built from reclaimed barnwood, which is a wonderful way to repurpose this old lumber. This trend has become so popular that old barnwood is now scarce and can be costly, as homeowners desire to use it in many furniture designs. In this post, DIYer and Simpson Strong-Tie Brand Ambassador Jaime Costiglio shows you how to create a beautiful faux barnwood table.
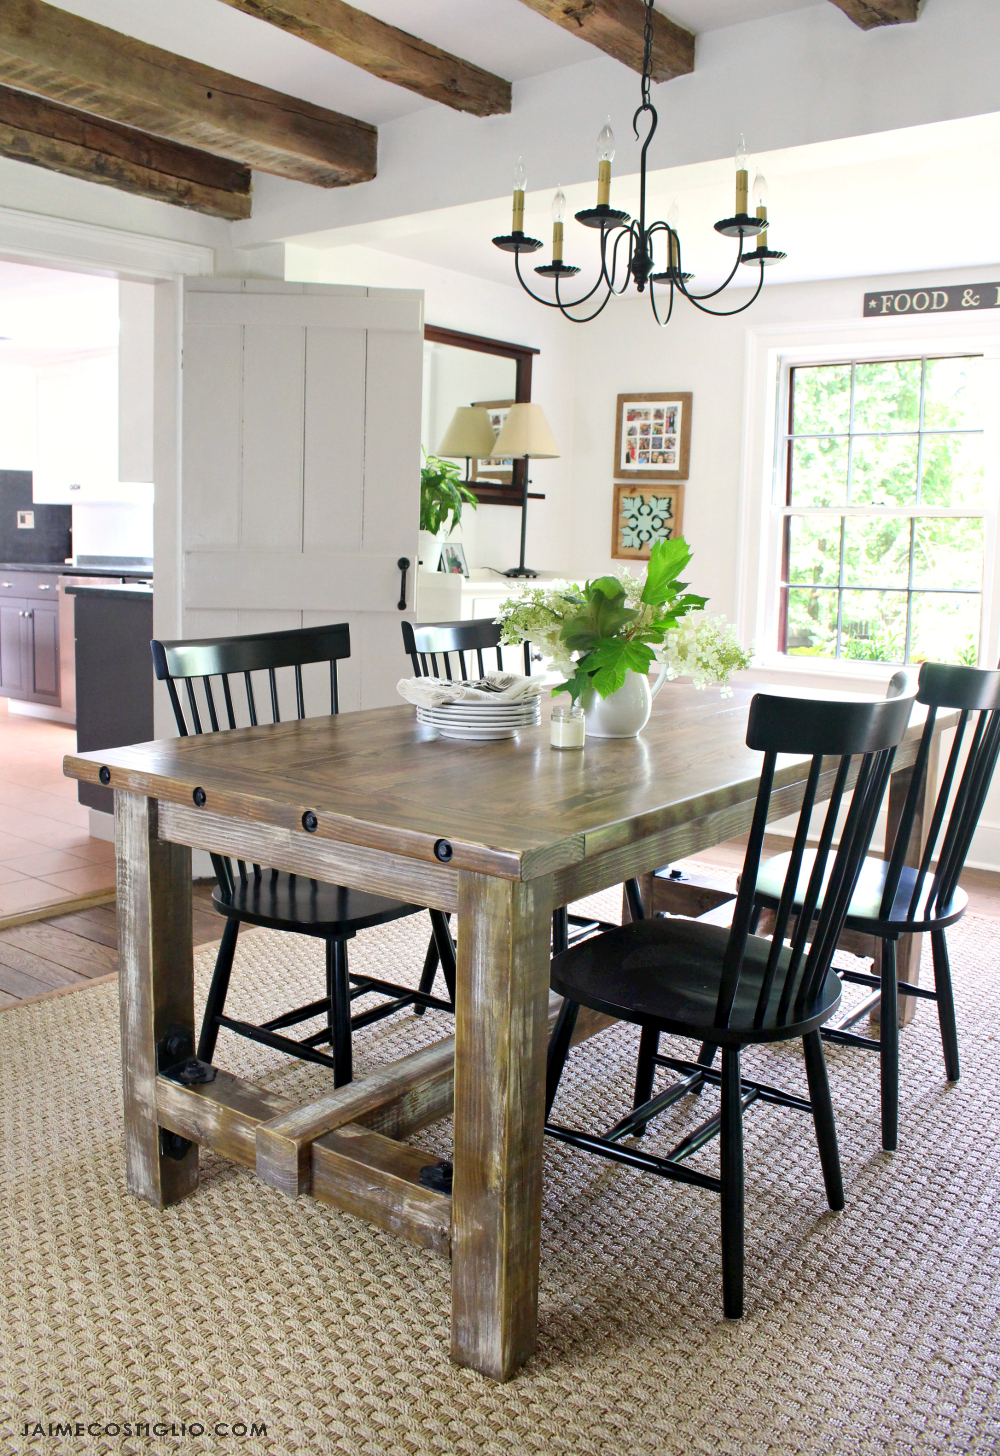
Living in a 1740 saltbox farmhouse, I can almost guarantee that at some point there was a farmhouse table made from barnwood in use within our home. As a nod to history I made a faux barnwood table for our dining room using new lumber, and I’m sharing the plans here.
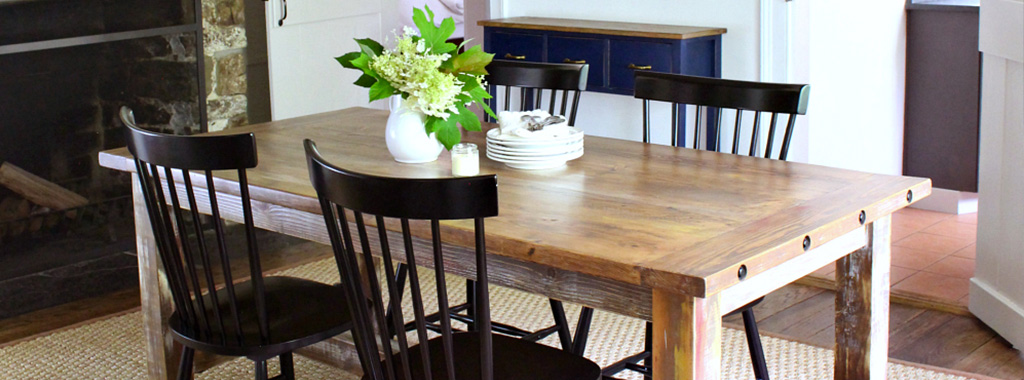
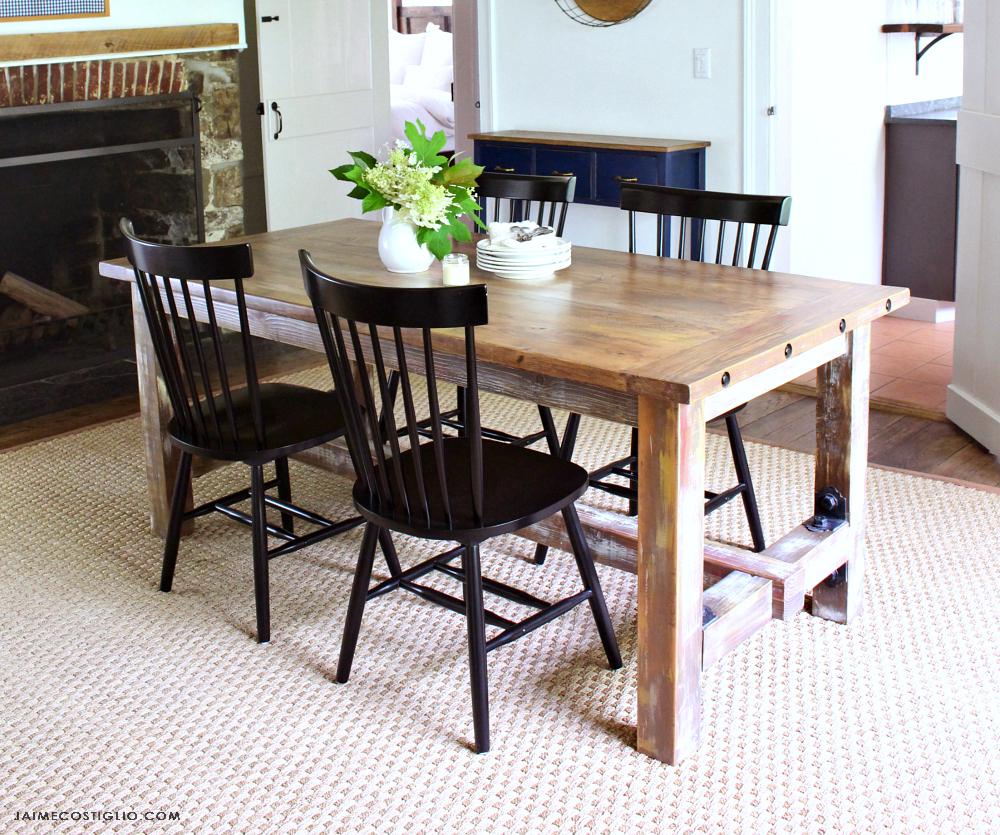
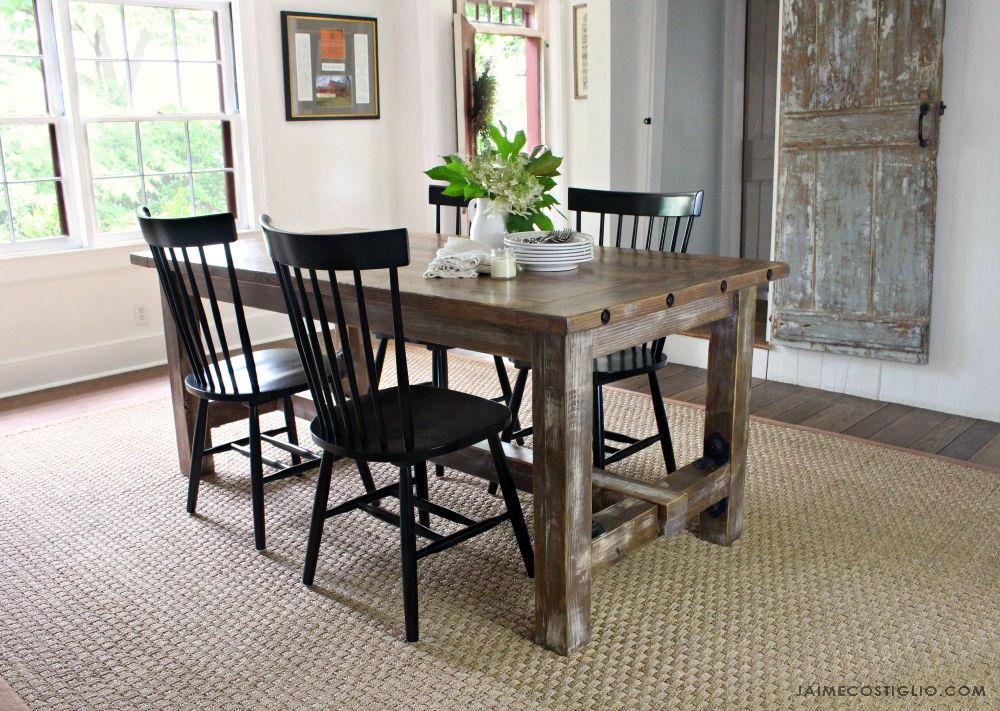
Historically, farm tables were very basic in design with planked tops and square legs all cut and built using very primitive tools. I modeled this faux barnwood table with those same basic design ideas using off-the-shelf lumber — nothing complicated, just a solid wood table with beautiful black powder-coated hardware.
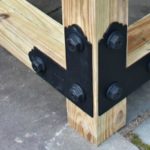
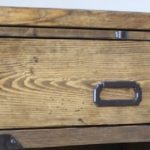
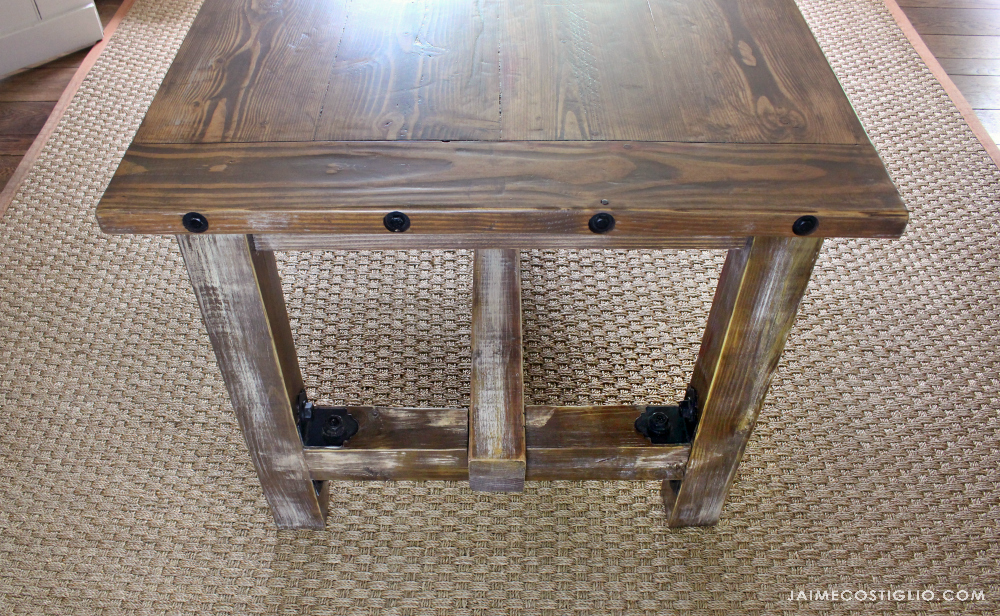
You’ll notice the black bolts at the short ends, which are actually purely decorative for this table. Hundreds of years ago, these “breadboard” end boards were thinner and usually attached with a similar method. I love how the black bolts tie in with the black angles at the leg supports.
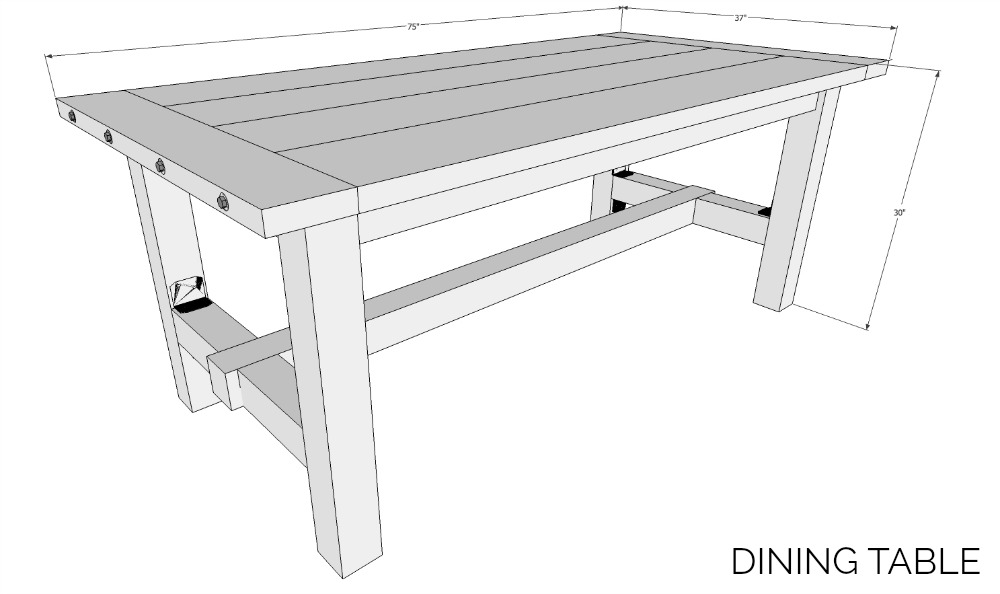
This table comfortably seats four to six people, depending on the size of your chairs. If you desire a more permanent seat on the ends, consider using a thicker breadboard or elongating the center boards. Because this table sits in the center of our dining room — a major passageway in our home — we won’t be using the end seats except when necessary.
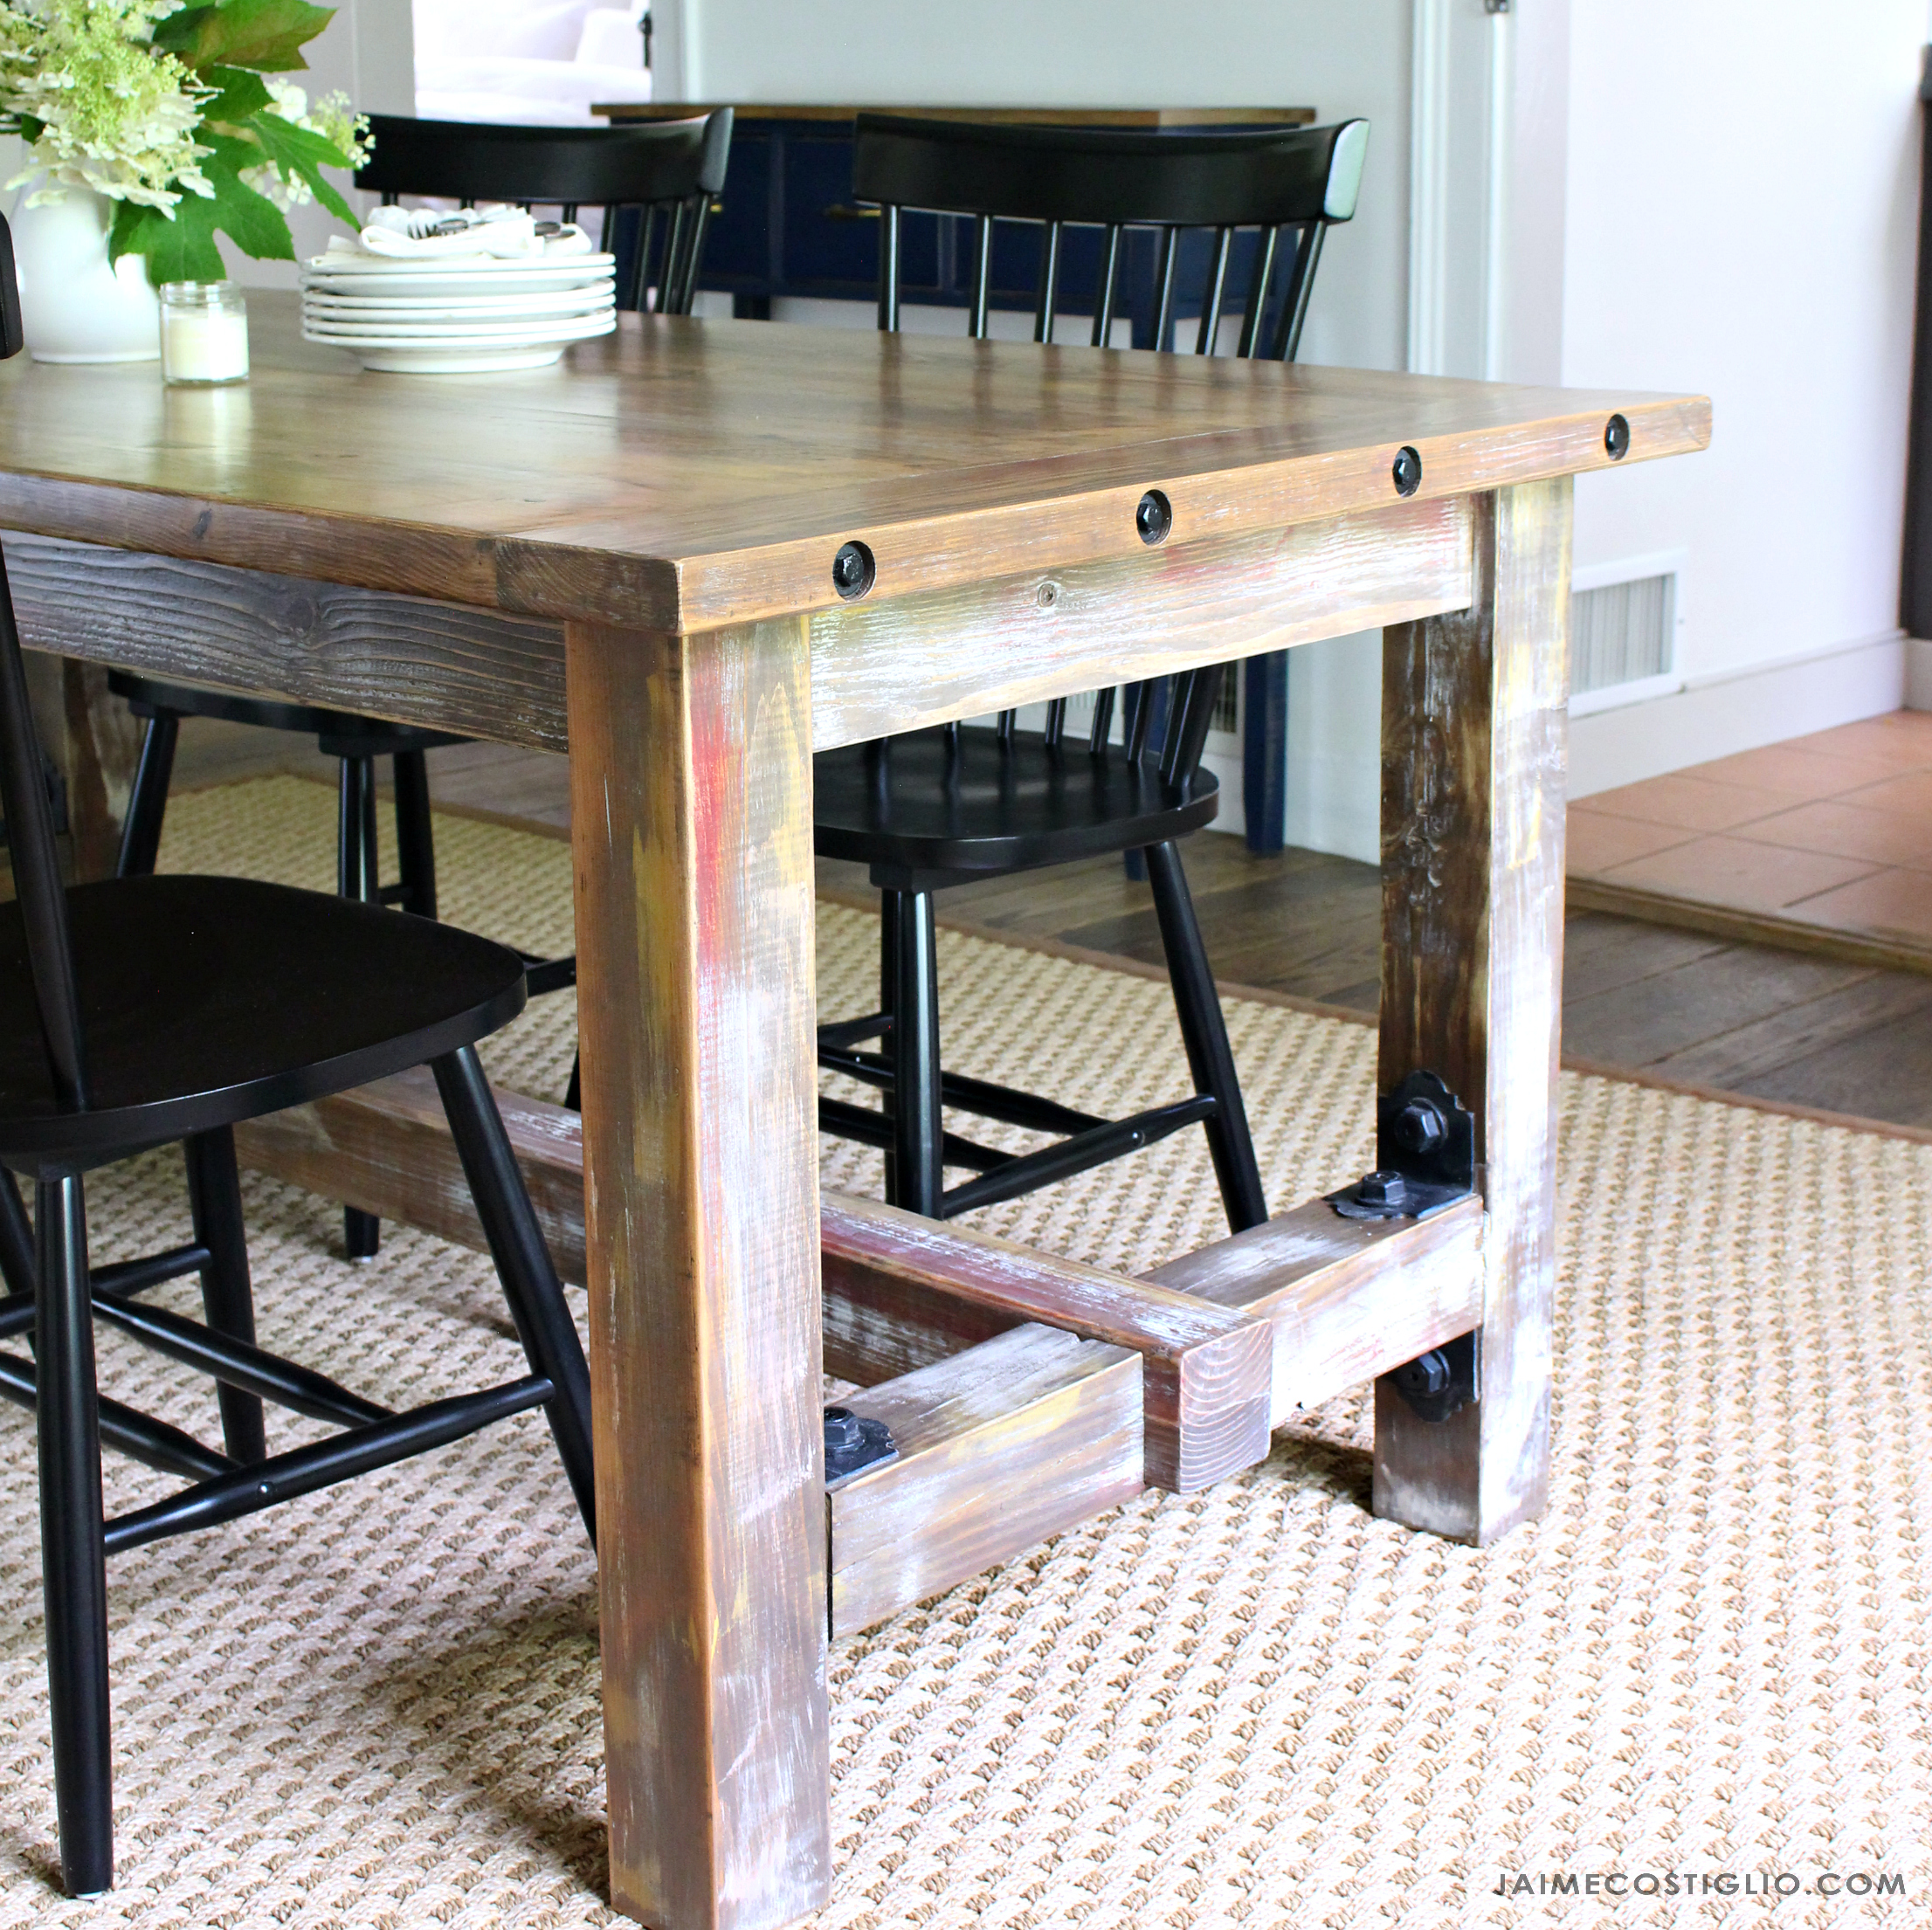
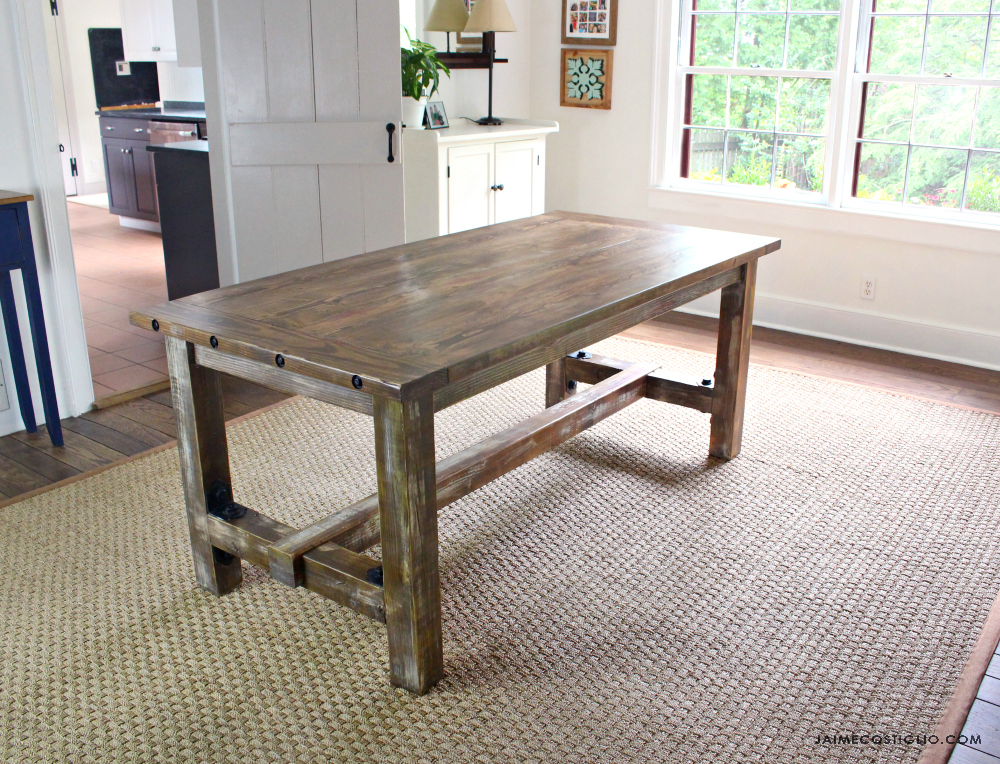
To achieve that faux barnwood look I added a bit of paint to the finish using a drybrush technique. Ultimately the finish is all up to you; how you want the wood to look and reflect in your home is a personal choice. When considering my finish, I was thinking that naturally, many barns were painted — so the boards used to make tables might have had some old paint on them. And it’s a style that fits well with our décor.
In the plans below, I used dowel joinery for construction of the tabletop. Alternatively, you can use dominos. I would avoid using biscuits because the 2×10 is a wide, heavy board and needs something larger to grab onto. Also, I ripped off the curved edge commonly found on 2x boards to make a sharp, flat edge, which makes for smooth joining of the boards.
Materials:
- (2) 2x10x12 boards
- (1) 2x6x8 board
- (2) 4x4x10 posts
- (3) 2x4x8 studs
- (8) Simpson Strong-Tie® Outdoor Accents® APA4 90 angles
- (16) 3½” Simpson Strong-Tie Outdoor Accents structural wood screws
- (16) Simpson Strong-Tie Outdoor Accents hex-head washers
- (2) ⅝” dowel @ 48″
- (8) ¼” dowel pins
- (8) ⅜” x 3″ hex-head screws
- (8) Washers
- Wood glue
- Black matte textured spray paint
- 2½” pocket-hole screws
- (8) Tabletop fasteners
Tools:
- Circular saw or table saw
- Miter saw
- Drill
- Multi-tool with flush-cut bit
- Forstner bits
- Pocket hole jig
- Measuring tape
- Pencil
- Belt sander and palm sander
Cut List:
- (4) 2×10 @ 64″ (tabletop) *cut long and trim after glue up
- (2) 2×6 @ 37″ (breadboard ends)
- (4) 4×4 @ 28½” (legs)
- (2) 2×4 @ 24″ (short aprons)
- (2) 2×4 @ 60½” (long aprons)
- (2) 2×4 @ 26½” (center supports)
- (2) 4×4 @ 24″ (short-end cross supports)
- (1) 4×4 @ 69½” (long cross support)
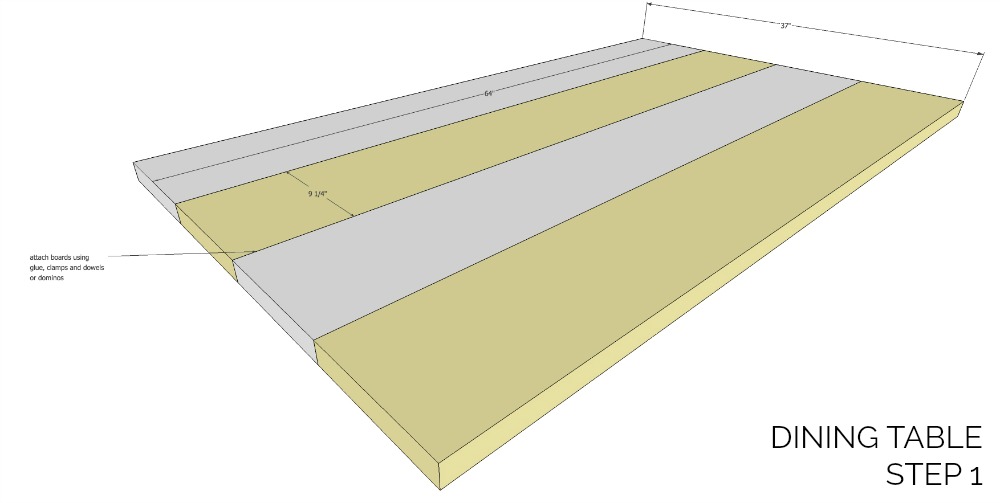
Step 1: Attach tabletop boards using dowels (or dominos) and glue. Consider ripping off the rounded edge to make a sharp, flat edge with more surface area for connecting the boards. Clamp and let dry.
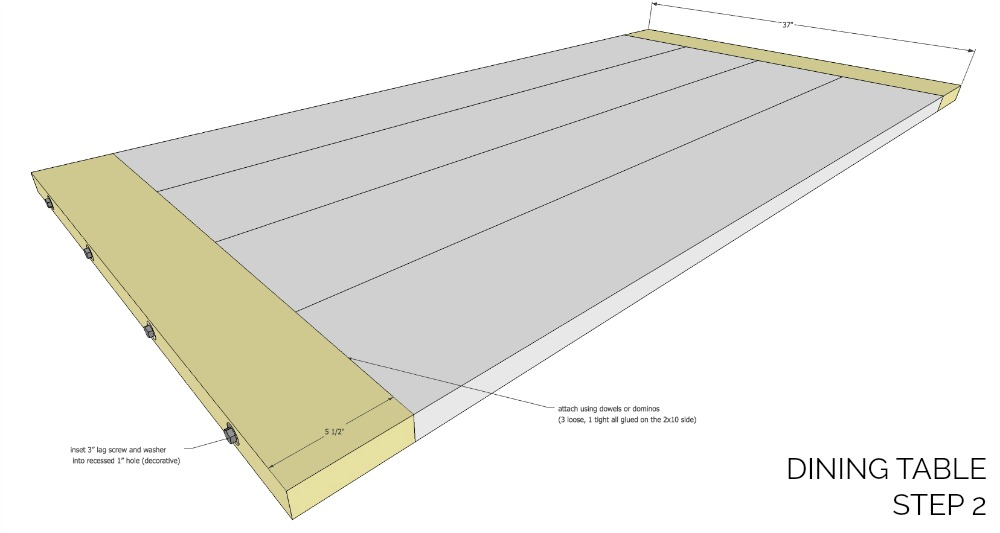 Step 2: Trim tabletop ends flush and attach breadboard end using dowels. Use glue on dowels in tabletop; no glue on breadboard side except one dowel. Make dowel holes loose on breadboard side (except one) to allow for wood movement. Once breadboard is in position secure dowels with vertical ¼” dowel pins drilled down into dowels, only gluing last ¼”.
Clamp lengthwise and let dry, then trim flush any ¼” dowel bits sticking up using a multi-tool with a flush-cut bit.
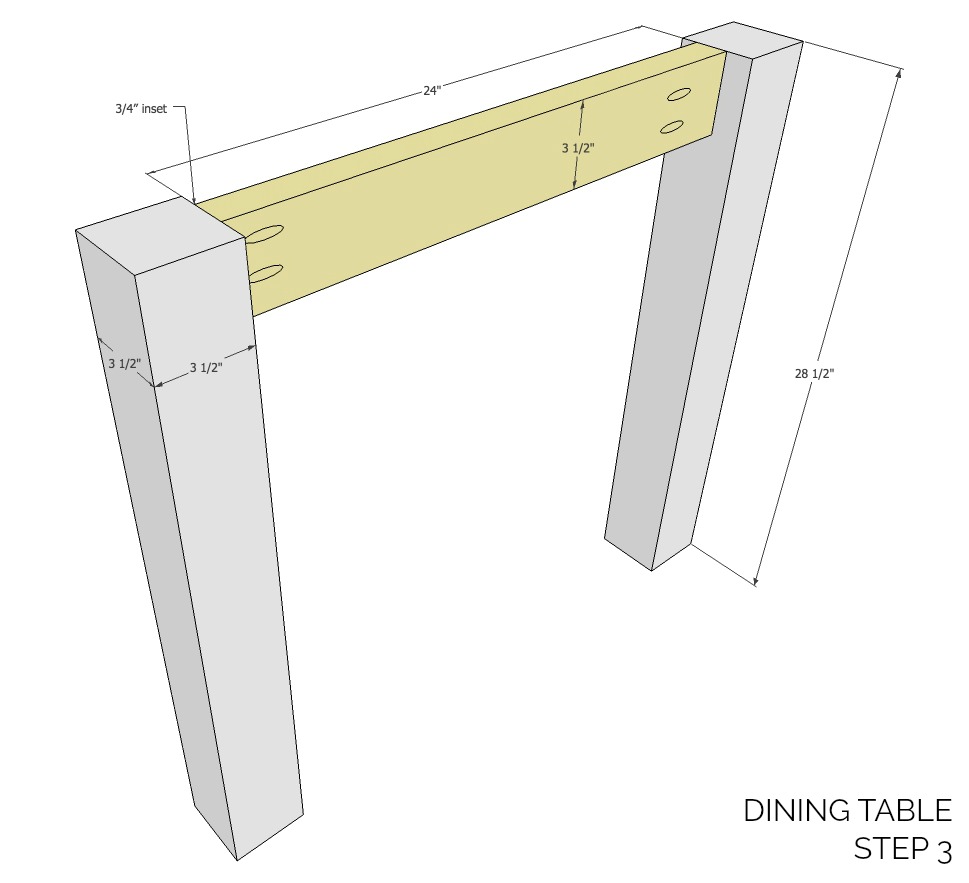
Step 3: Attach legs to short apron using wood glue and 2½” pocket-hole screws. Keep apron inset ¾” from front edge. Make two.
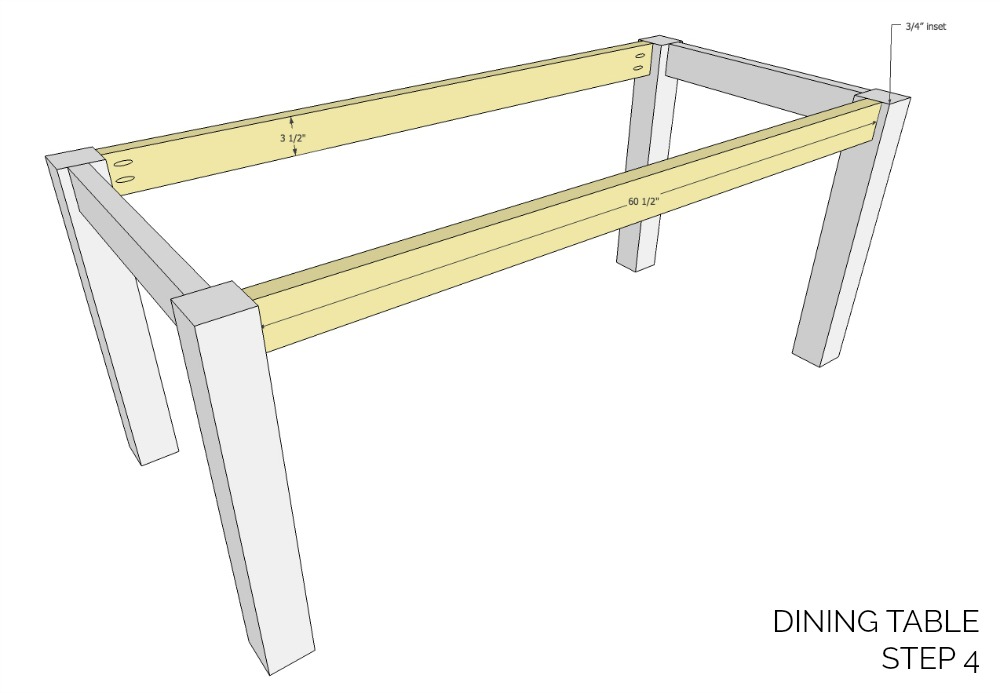
Step 4: Attach long aprons to leg pieces using wood glue and 2½” pocket-hole screws. Keep apron inset ¾” from front edge.
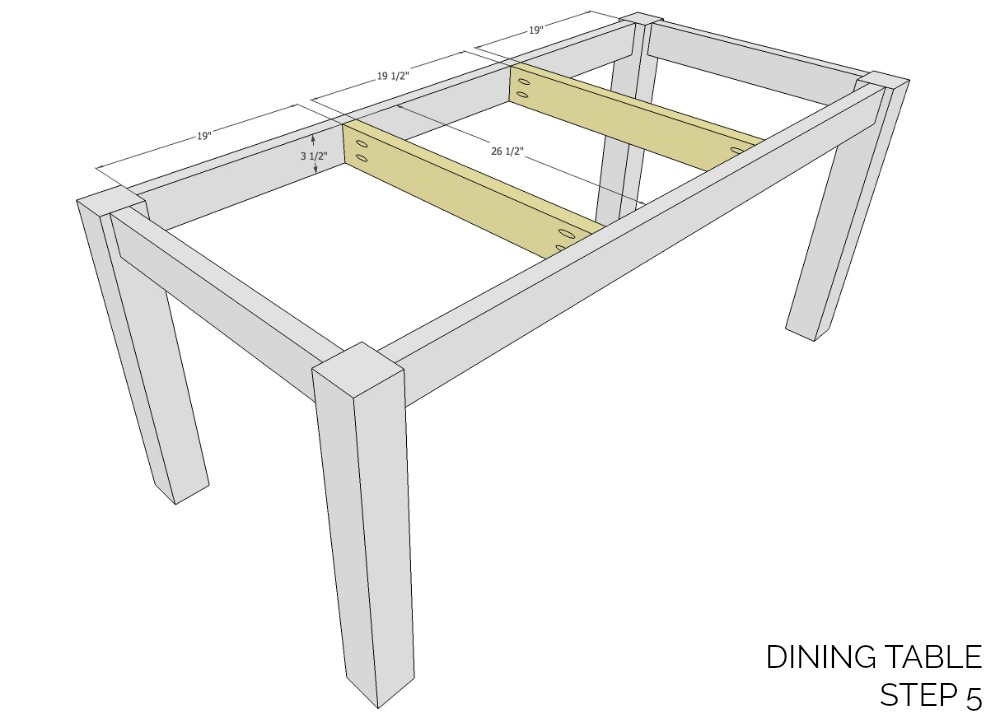
Step 5: Attach center supports to long aprons using wood glue and 2½” pocket-hole screws.
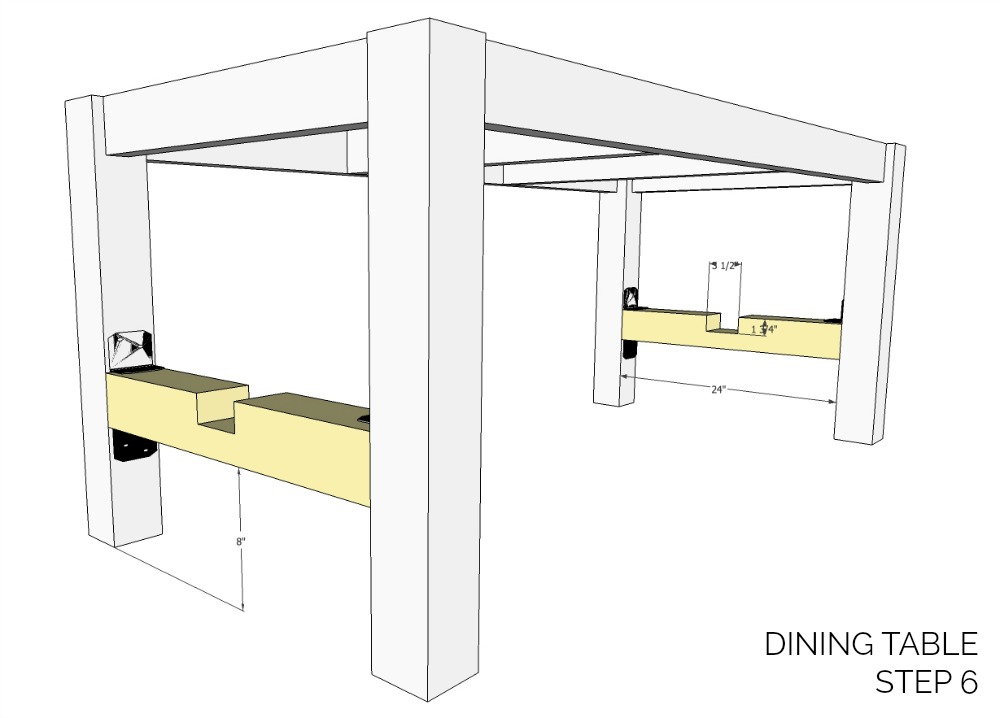
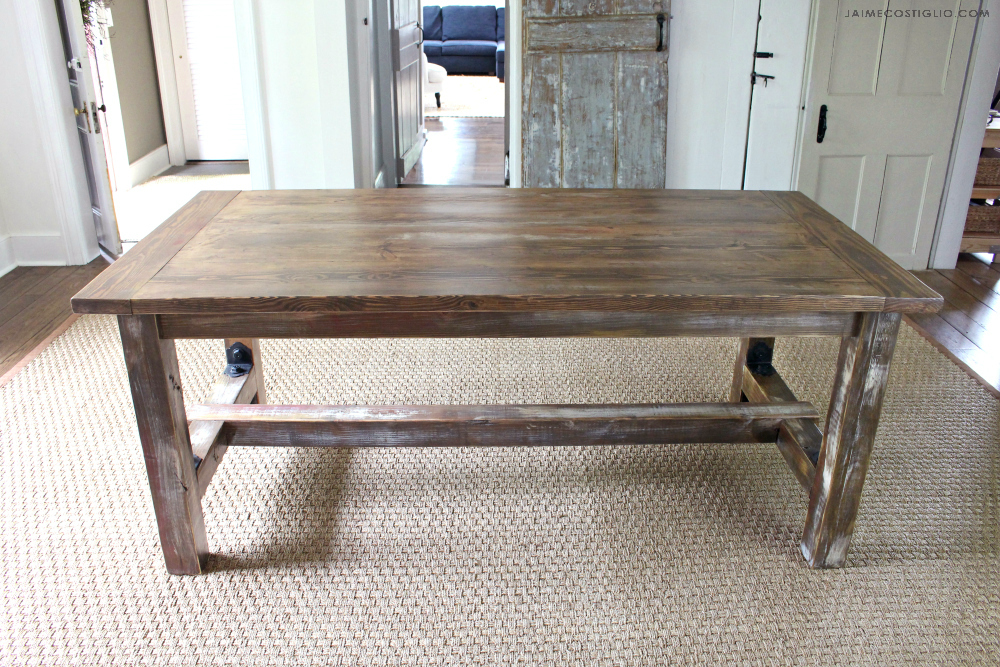
Step 6: Make half-lap joints in top portion of short end cross supports. Secure to legs using APA4 90 angles, 3½” structural wood screws and hex-head washers.
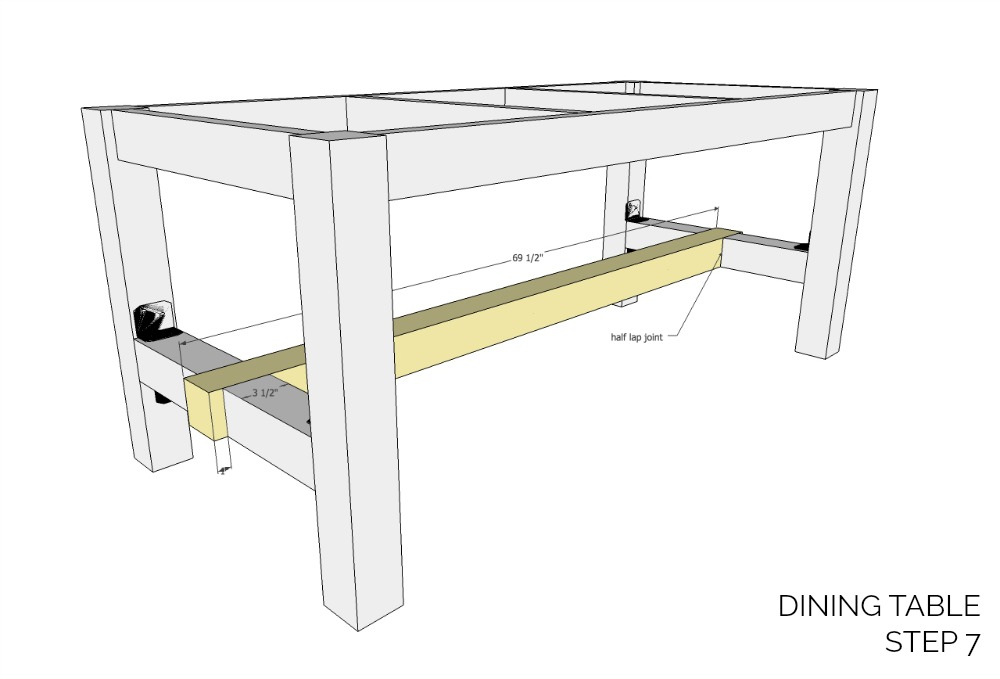
Step 7: Make half-lap joints into bottom portion of long cross support and place into position.
For finishing details, be sure to check out Jaime’s blog post here. Also, there’s a short video demonstrating construction of this table here.
Attach the tabletop to the base using tabletop fasteners, which allow for slight wood movement as the seasons change.
Are you in need of a farmhouse-style table and looking to build your own to fit your family’s needs? Just as they did hundreds of years ago, we, too, can build functional, purposeful furniture — and it’s easier than ever with power tools, readily available lumber and solid hardware. We will be enjoying this faux barnwood table for many, many years to come.
OUTDOOR DIY PROJECTS
- How to Build a Cool, Modern Chicken Coop
- How to Build a Floating Deck
- How to Build a Outdoor Accents Pergola
- How to Build a Simple Rolling Planter